Unreal 2 the awakening прохождение. Руководство и прохождение по "Unreal II: The Awakening". Быть или не быть
Когда разработчики Unreal II: The Awakening создавали игру, они, по-видимому, высочайший приоритет определили ее графической стороне. Остальные составляющие оказались в подчиненном положении. Там, где было необходимо, придумывали подоплеку для миссий на очередной невозможно красивой планете. Когда требовалось оживить мир, запускали в него врагов и скриптовали их поведение. В результате получилась насыщенная яркими красками игра, не представляющая большой сложности для прохождения.
Тем не менее, несколько неявных моментов в игре есть, и имеет смысл обратить на них внимание. А заодно стоит ознакомиться с некоторыми тактическими приемами, облегчающими сражения с врагами, и разобраться с оружием, которого в игре предостаточно.
Начиная читать данное руководство, помните: оно написано после прохождения игры, поэтому в нем раскрыты некоторые детали сюжета, которые, возможно, вы хотели бы узнать сами. Если это не входит в ваши планы, пропустите секцию "Персонажи ": основные сюжетные секреты описаны в ней.
Сложность
В игре три уровня сложности: легкий, нормальный и нереальный. Для стрелка со стажем не составит проблемы пройти игру на самом сложном уровне. Если вы знаете, как пользоваться мышью и что такое "стрейф", но достаточно уверенно в боевиках себя не чувствуете, вам подойдет средняя сложность. Если же этот жанр для вас не совсем родной или не хочется тратить силы на выживание, лучший вариант — легкая игра.
От выбора зависит только опасность врагов: чем большую самоуверенность вы проявите, тем активнее будут действовать оппоненты, стреляя чаще и нанося больше повреждений.
Однако не спешите перезапускать игру, если вам на первом уровне придется несладко. По моим ощущениям, начало игры самое сложное, дальше играть гораздо проще. Успешно справившись с первым заданием, пройдите еще пару уровней, и если по-прежнему будут проблемы, начните заново на другой сложности. Или введите код, который можно найти в соответствующем разделе нашего журнала.
Персонажи
"Атлантис" . Корабль, на котором герои игры патрулируют удаленный сектор галактики. Видавшая виды посудина, но все еще способная доставить команду в заданную точку. Обычно остается на орбите, пока капитан улетает на миссию на маленьком челночном корабле.
Джон Далтон . Капитан "Атлантиса". Главный герой, от лица которого ведется игра. Бывший десантник, с позором изгнанный из элитных войск за несоблюдение субординации. Выражалось это в прямом неподчинении командиру: во время выполнения задания был отдан приказ оставить раненого, но Далтон поступил наоборот. Эта черта характера снова проявится на одной из миссий.
Айда . Старший помощник на "Атлантисе". Стратегический гений, герой последней войны, которая была выиграна только благодаря ей. Заманив вражеский флот на удаленную планету, земляне уничтожили ее полностью, пожертвовав сотнями колонистов. Айда не может простить себя за этот поступок, хотя ценой жизни немногих были спасены миллионы.
Айзек . Инженер корабля. Отлично разбирается в технике и постоянно снабжает Далтона новым оружием. Попал на "Атлантис" после драматичного случая. Во время стычки со скаржами, Айзек управлял шлюзом, через который штурмовые команды уходили в бой. Раненый, он запаниковал и открыл внешние створки раньше времени; отряд, находившийся внутри, погиб в бесконечном космосе.
Хоукинс . Директор Управления Земных Колоний, на службе у которого пребывает Джон Далтон со своей командой. Одержим жаждой власти и искушен в интригах. Главный злодей игры, до последнего момента притворявшийся белым и пушистым. Достиг заслуженного финала при непосредственном участии Джона Далтона.
Стороны
Сюжет игры завязан вокруг загадочных артефактов, доставшихся в наследство от какой-то древней расы. Владение ими — путь к неограниченной власти, потому не удивительно, что несколько сторон ввязались в жестокую схватку из-за семи странных предметов.
Terran Colonial Authority или Управление Земных Колоний. Галактическая полиция, поддерживающая порядок на планетах с поселенцами с Земли. Только историческая принадлежность к этой организации делает ее союзником Далтона.
Marines . Космические десантные войска, из которых со свистом вылетел Джон Далтон. Экипируются стандартным оружием: пистолетами, штурмовыми винтовками, дробовиками, гранатометами и ракетницами.
Axon Corporation . Исследовательская корпорация, сотрудничающая с военным министерством. Наши в доску люди, которых нужно всячески оберегать.
Liandry Corporation . Индустриальная корпорация, занятая тяжелым машиностроением и добычей полезных ископаемых. На ее службе состоят женские батальоны смерти — Liandry Angels. По сути — обыкновенные десантники, только враждебные.
Izanagi Corporation . Судя по всему, потомки японских промышленников. Чтут старые кодексы, на службе содержат наемников, называющих себя Ghost Warriors. Они также могут считаться подобием десантников, противостоящих официальной власти.
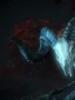
Scaarj . Скаржи, агрессивные инопланетяне, враги еще со времен первого Unreal . Предпочитают воевать поодиночке, и это для нас единственное спасение. Уворачиваются от выстрелов, стремительно наскакивают, кромсая жертву стальными лезвиями, выдерживают несколько попаданий даже из гранатомета. На большом расстоянии могут стрелять энергетическими зарядами.
Izarians . Злобные существа с садомазохистскими наклонностями. Попали в рабство к скаржам, действуют на их стороне. Вооружены копьями, которые могут выпускать электрические разрядами.
Kai . Мирная раса межзвездных странников. Предпочитают проводить время, изучая древние цивилизации и прислуживая другим расам. Энергия артефактов превращает их в смертельно опасных воинов, противостоять которым практически невозможно.
Araknids . Пауки, выросшие до чрезвычайно больших размеров. Как обычно, виноваты в этом ученые, которые перешли все границы в своих экспериментах, за что и поплатились. Хорошо хоть восьминогие твари не стали умнее и не приобрели повышенную стойкость к повреждениям, а то бы пришлось совсем худо. Ставят мины из коконов с паучатами, могут внезапно наброситься и покусать.
Drakk . Инопланетная роботизированная раса. По словам Айды, почти неуязвимы; на самом деле, из-за своей металлической сущности просто долго убиваются. Занимаются отвратительными экспериментами над другими жителями галактики, за что их можно только уничтожать. Используют в перестрелках рейлганы с лазерным наведением и смертельно опасные лучи.
Оружие
Имея такую армию врагов, нужно противопоставить им не менее внушительный арсенал. Так и есть: уже в начале игры доступны отличные средства уничтожения противника. После посещения планет к ним добавляются новые экземпляры, а прежние стараниями Айзека становятся мощнее или приобретают новые возможности.
T-13 Popgun . Оружие последней надежды. Не требует боеприпасов, стреляет сгустками энергии. Во вторичном режиме может накапливать мощный заряд, который затем с одного раза убивает почти любого врага. Из-за малой скорости полета выстрела неэффективен на больших расстояниях. Быстро теряет скорострельность и требует накопления энергии.
M32 Duster . Штурмовая винтовка. Стреляет очередями или мощным зарядом из пяти пуль. Универсальное оружие и вполне достаточное для прохождения почти всей игры. Во вторичном режиме пули рикошетят от любых поверхностей.
M406 Hydra . Ручной гранатомет. Можно взрывать выпущенные гранаты с задержкой, если перед выстрелом некоторое время удерживать кнопку. Имеет шесть видов боеприпасов (весь комплект будет доступен только к концу игры): разрывные, зажигательные, отравляющие, электромагнитные, оглушающие и дымовые.
Vulcan . Огнемет. Впечатляюще действует на близком расстоянии. Враг загорается и начинает с воплями бегать по округе, забыв о стрельбе. Удобен для создания плотной преграды на пути толпы врагов. Во вторичном режиме распыляет горючую жидкость, которую затем можно поджечь.
M700 Shotgun . Еще одно оружие для поражения одновременно нескольких врагов. Между выстрелами — пауза на перезарядку, из-за которой проигрывает по эффективности огнемету. Во вторичном режиме стреляет зажигательными пулями.
Shark . Тяжелая многозарядная ракетница. К сожалению, не может гарантировать стопроцентную смерть любого противника, но обычно так и происходит. Во вторичном режиме стреляет четырьмя ракетами с самонаведением, для его предварительно задаются цели при нажатой кнопке и наведении прицела на нужный объект.
Grace . Личный пистолет Айды. Пятидесятый калибр гарантирует мгновенную смерть при попадании в голову. Тем более что заряды разрывные. Во вторичном режиме выпускает по три пули подряд.
Widowmaker . Снайперская винтовка с компьютерной системой наведения, которая включается кнопкой вторичного режима. С помощью колесика мыши или клавиш смены оружия меняется степень увеличения. Выстрел в голову убивает наповал. Попадание в иные части тела может оставить цель в живых.
Shocklance . Трофейное оружие, отобранное у Izarians. Стреляет сдвоенным электрическим разрядом с повышенным числом рикошетов. После доработки Айзека стало мощнее, а во вторичном режиме выпускает энергетический сгусток, опасный для автоматических устройств.
SpiderGun . Зачем Айзек сконструировал это странное устройство — непонятно. Врагов оно не убивает, только заставляет отвлечься от перестрелки. Сгусток пауков, попадая на противника, заставляет его вопить и пытаться стряхнуть с себя мерзких членистоногих, но продолжается это не слишком долго. Во вторичном режиме прилепляет к поверхностям коконы, из которых вылезают пауки, если кто-нибудь оказался поблизости.
Drakk Laser . Рейлган — оружие высокой мощности и мгновенного действия. Во вторичном режиме испускает на короткое расстояние постоянный (пока есть заряд) луч.
Takkra . Автономный боевой робот. Похож на джедайский тренировочный шарик из "Звездных войн ". В первичном, атакующем, режиме летает вокруг указанной жертвы и расстреливает ее из слабого лазера. Во вторичном, защитном, режиме остается возле своего владельца и сбивает все подлетающие выстрелы врагов.
Силовое поле . Пассивная защита. Столбы устанавливаются кнопкой выстрела и соединяются друг с другом лучами, если находятся достаточно близко. Через лучи можно проходить с помощью клавиши "Использовать". Ей же столбы снимаются обратно в запас. Стрелять насквозь нельзя.
Автоматические пушки . Активная защита. Бывает двух типов: пулеметная и ракетная. После установки отслеживает и уничтожает цели в автоматическом режиме. Может быть возвращена в запас клавишей "Использовать".
Уже на первом уровне вы заметите неприятную способность врагов стрелять с упреждением. Если в момент выстрела противника вы перемещались и не желаете менять характер своего движения, то неизбежно встретитесь с выпущенным зарядом. Поэтому немедленно выбирайте другое направление, если видите, как к вам приближается ракета или сгусток энергии.
Вторичный режим стрельбы из штурмовой винтовки — отличная вещь, если уметь им пользоваться. Хорошо, конечно, попадать все время в голову, но это вряд ли возможно, когда цель постоянно перемещается. Поэтому действуйте по-другому: стреляйте в ноги или вообще в землю или пол перед врагом. Попав в препятствие, заряд расходится веером и поражает более широкую зону.
Снайперская винтовка может быть использована в качестве бинокля. Это поможет точно навестись на цель, а затем, не дергая мышку, выстрелить из другого оружия, не тратя драгоценные патроны от Widowmaker.
Если вам помогают десантники или автоматические пушки, можно использовать их как живой щит. Враги стреляют по ближайшей цели, поэтому, находясь позади всех, вы избежите ненужных потерь брони и здоровья. Не очень честно по отношению к соратникам, зато безопасно.
Не забывайте пройтись по трупу поверженного противника, чтобы восстановить броню. Правда, это относится не ко всем врагам. Определить нужного помогает синее свечение вокруг бездыханного тела.
Атакуя автоматическую пушку, помните: она немедленно ответит. Поэтому, сделав выстрел, постарайтесь или укрыться за чем-нибудь, или просто отойти в сторону, чтобы ответный огонь пришелся в пустоту.
Выстрел из ракетницы или гранатомета с близкого расстояния не так страшен для вас, как кажется. Если не подходить совсем уж в упор, взрыв причиняет совсем мало вреда.
Прохождение
Совершенная линейность Unreal II: The Awakening оставляет мало мест, где может возникнуть сложность с прохождением. Практически все вопросы решаются сами по себе, только зародившись. Встретив закрытую дверь или перегороженный проход, ищите поблизости другой путь, он, как правило, единственный. Исходя из этих соображений, прохождение игры будет изложено кратко, без расписывания, как вы в течение нескольких минут, расстреливая врагов, неуклонно продвигаетесь вперед. Надеюсь, все возникающие вопросы при этом будут освещены.
Sanctuary
Получив сигнал бедствия, Джон Далтон прилетает на планету Sanctuary. Сразу видно, что здесь похозяйничали безжалостные пришельцы. Мы тоже не станем заниматься гуманистическими философствованиями, а просто пройдем по коридорам базы, расправляясь с мерзкими тварями.
На этом уровне встретится первый скарж. Его появление будет чрезвычайно эффектным, но поединок окажет, скорее, психологическое давление, чем серьезно потреплет здоровье. Если не будете просто стоять и смотреть, как вас режут на куски.
Генератор, в который упал артефакт, перезапускается двумя рубильниками на стене и кнопкой на центральной панели управления. На дно генератора спускайтесь по вращающимся элементам конструкции. Внизу останется лишь победить громадного и живучего скаржа.
В зале с двумя вентиляторами по бокам, пролезайте через в правый в воздуховод. В его середине найдете рубильник, который включит левый вентилятор и воздух всосет пламя, освободив проход дальше.
Добравшись до искореженной комнаты, многократно пересеченной лазерным лучом, подлезайте под правую дверь, чтобы попасть внутрь. Нужно пройти по балкам на следующий этаж. Путь начинается слева и огибает все помещение. Наверху две кнопки, одна отключает лазер, другая открывает дверь двумя этажами ниже.
Затем вы попадете еще в одну контрольную комнату, в которой отключите лазерный луч в центре и через отверстие, в которое он бил, пройдете дальше.
Наконец, третья контрольная комната откроет дверь к дыре в полу, откуда выползают пауки. Через нее вы сможете проникнуть к еще одному лучу, самому мощному. Здесь произойдет душевная перестрелка с главной паучихой. После победы выключите луч и заберите артефакт.
Acheron
Сначала нужно забраться на большое строение слева и найти радиопередатчик. С первых реплик вас мгновенно расколют и пошлют группу товарищей разобраться. Так подъемник, который жизненно необходим для спуска в недра планеты, окажется наверху.
Внизу находите артефакт, накрытый оболочкой, и активизируете три детонатора. Подобрав драгоценную вещицу, возвращаетесь к своему челноку.
Severnaya
Одного из десантников спасти не удастся, как ни пытайтесь. Но после него останется снайперская винтовка, которую стоит подобрать.
Внутрь дамбы нужно проникнуть через водосток. Первая бомба расположена на трубе, путь к которой начинается под лестницей. От нее поднимайтесь на самый верх и через люк в потолке проникайте в контрольную комнату. Здесь нажмите на пульте кнопку, чтобы открыть входную дверь.
Позади вас выход на лестницу, по которой спуститесь до первой двери, и за ней на толстой вертикальной трубе найдете вторую бомбу.
Выходите из комнаты через дверь в противоположной стене, чтобы попасть в центральный коридор. Направо будет выход, налево — большой машинный зал. Третья, последняя, бомба прикреплена к корпусу турбины позади и чуть правее. Самый короткий путь — проползти под железными плитами, ведущими наверх, осторожно соскочив к турбине перед поворотом. Можете пойти кружным путем, в конце которого надо будет попрыгать по трубам. Обратно уходите по трубам сразу слева от бомбы. Пяти минут должно хватить, чтобы покинуть планету.
Kalydon
Чисто оборонительная миссия. Снаряжение, о котором говорил Айзек (в него входят две автоматические пушки и несколько столбов для организации силового поля), лежит в конце левого каньона. Враги будут нападать группами последовательно с разных сторон, иногда засылая одного диверсанта прямо к вам в тыл. Не удаляйтесь далеко от стены, иначе можете прозевать, как враги начнут взламывать дверь.
Sulferon
Обучающая миссия. Но учителем на этот раз выступаете вы. Сначала демонстрируете, как один человек захватывает укрепленную базу противника, а затем — как один человек обороняет ее от превосходящих сил. Имеющихся в подчинении десантников стоит сконцентрировать в контрольной комнате на случай, если кто-то из врагов успеет в нее проникнуть.
Зачистив базу, не забудьте отключить в башне управления (лифт налево от центрального входа) вызов помощи, а то на него слетятся все Izanagi галактики.
Janus
В помещение, где пытают доктора Майера, можно попасть через вентиляционный канал. Вход в него находится в комнате справа от запертой звери и охраняется автоматическим пулеметом. Разберитесь с ним, проползайте вперед, и вас подхватит потоком воздуха и поднимет наверх. Теперь осталось только спасти Майера, заполучить два артефакта и сопроводить своего нового спутника на крышу, где вас подберет корабль. Заключительный этап — оборонительный. Обратите внимание, что внутрь ангара ведут три двери: одна большая в центре и две маленькие по бокам напротив нее.
В какой-то момент Майер попросит помочь с антенной, которая находится снаружи у отметки "4". Когда выполните его просьбу, как раз прилетит новая группа врагов. Долго с ними не возитесь, а то кто-нибудь проникнет в ангар и убьет Майера.
Na Koja Abad
Силовое поле на дороге к базе отключается в небольшом здании справа. Внутри есть электрощит, открыв который, вы увидите нужную кнопку.
Мимо главного здания проходите, не задерживаясь. Вход в него заперт, и войти можно только через широкую трубу в левой части.
Внутри базы тоже придется лазать по узким и пыльным закоулкам, чтобы обходить запертые двери. В лабораториях присматривайтесь, нет ли каких полезных вещей.
Внутри странного объекта пришельцев в самом конце за сетью лазеров лежит еще один артефакт. Нужно проявит ловкость, чтобы, подлезая под лучи и, перескакивая через них, добыть цель своего прилета на эту негостеприимную планету. Обратный путь осложнят появившиеся хозяева.
Drakk Hive
За седьмым артефактом, необходимым для полной коллекции, предстоит отправиться в самое логово древней расы пришельцев.
Механические враги весьма своеобразны. У них два класса: управляющие, которые сидят за непробиваемыми стеклами, и солдаты, появляющиеся с резким звуком откуда-то снизу. Два выстрела из Drakk Laser Rifle почти убивают солдат, и провоцируют управляющих открыть свои ячейки. В этот момент их и нужно отстреливать. Но это совсем необязательно, просто может появиться такое желание после увиденных жутких экспериментов.
Проникнув в сердце мира Drakk, вы встретитесь с их предводителем. Как и подобает большому боссу, у него две жизни. Во второй стадии инопланетянин пребывает сразу в двух частях, одна из которых стреляет, а другая летает невдалеке и подставляется. По первой стрелять бесполезно, всю огневую мощь нужно сосредоточить на второй. Причем расстреливать надо прозрачную сферу в нижней части врага. Это верно и в тот момент, когда босс составлял единое целое.
Разобравшись с противником, забирайте последний артефакт и можно возвращаться домой, на Avalon.
Avalon
Родную планету атаковали скаржи. Им удалось проникнуть в самое сердце TCA и активизировать для собственной защиты большую ионную пушку. Первое задание — ее отключить. Второе — помочь уцелевшим организовать оборону. Ваш вклад будет простым: один из десантников проберется к генератору, чтобы починить его, а вы сверху будете его прикрывать, расстреливая нападающих скаржей из снайперской винтовки. Потом вас проводят к месту, откуда всех должны забрать на борт флагмана флота TCA The Dorian Grey.
The Dorian Grey
Развязка близка. Одержимый жаждой власти Хоукинс использует артефакты и создает неудержимого монстра. От зарядов антиматерии прячьтесь за колоннами и выступами стен, а сами расстреливайте монстра, пока он не потеряет свою ужасную руку. Теперь подберите ее и аннигилируйте противника.
Выходите из зала. Пришло время познать истину и расставить точки над "i". Воздав Хоукинсу по заслугам и позаботившись, чтобы артефакты навсегда исчезли из реальности, нужно и самому выбираться с гибнущего корабля.
Пройдя через пару комнат, вы попадете в камеру охлаждения реактора. Когда гравитация уменьшится, не переходя на другую сторону, запрыгивайте на верхний балкон (лучше сбоку от полукруглого выступа), причем клавишу прыжка удерживайте, пока не окажетесь, где нужно. Через двери идите вперед и снова запрыгивайте на балкон справа.
Когда упретесь в глухую стену, еще раз прыгайте. Нужная дверь — наверху слева. Теперь коридор приведет прямо к спасательным капсулам, причем осталась только одна, самая последняя.
Easter Egg
Санктурианский кроликоподобный грызун, один раз с плачевным для "Атлантиса" результатом поучаствовавший в основном сюжете, способен доставить и иную радость. Например, в первое появление на корабле вы можете найти его в люке на верхней палубе по левому борту, напротив каюты Не"Бана. Последовательно выбирая действия 1, 3, 2, 3 (Spam, Spam, Spam, Humbug), вы сильно удивитесь сообщению, полученному с планеты Sanctuary.
Всемирную популярность Unreal получила практически сразу после своего выхода. Игра, созданная тогда еще Epic MegaGames, вышла в 1998 году под покровительством GT Interactive. Unreal имела три неоспоримых достоинства, вознесших ее на Олимп неугасающей славы. Это: интригующая сюжетная линия, фантастическая игровая вселенная и великолепная графика. По качеству освещения, размерам текстур и многим другим параметрам Unreal удалось переплюнуть своего самого главного на тот момент конкурента - Quake 2. В связи с популярностью оригинального Unreal, Epic выпустила несколько дополнений, одно из которых было доверено тогда еще очень известной в жанре приключений студии Legend Entertainment. Компания с честью справилась с возложенным на ее плечи делом. Потом был немного странный Wheel of Time и несколько менее известных сторонних разработок. Прошли годы с момента появления Unreal, и мир увидел превосходный Unreal Tournament, - уже совсем иную игру, от теплого содружества Epic и Digital Extremes. Сетевая разработка стала полноценным конкурентом менее динамичному и предсказуемому Quake 3: Arena. В прошлом году Digital Extremes совместно с Epic выпустили Unreal Tournament 2003, призванный стать основоположником серии UT20xx вплоть до 2010 года. Каждые двенадцать месяцев должна выходить новая часть, подобно спортивным симуляторам NHL, FIFA, NBA, тем самым привлекая все больше и больше фанатов киберспорта.
In the begining
В одном из первых пресс-релизов Legend обещала в Unreal 2 совместить лучшие качества атмосферного Unreal и динамичного UT. Да, она действительно попыталась соединить некоторые элементы игрового процесса двух монстров, но, к сожалению, это требовало больше времени и усилий, чем мог предложить неспокойный игровой рынок. Unreal 2 рассказывает совсем другую историю. Игра больше напоминает поход в музей со школьной экскурсией: быстрым шагом (бега в U2 нет - костюмы тяжелые) мы осматриваем достопримечательности далеких планет, время от времени постреливая в воздух...
Далеко-далеко в галактике...
После того как официально было разрешено исследование чужеземных цивилизаций и дальнейшая их эксплуатация в своих целях, правительство Земли постепенно становилось все слабее и слабее, теряя контроль над многочисленными колониями. Корпорации же, занимающиеся исследованием космоса, наоборот набирались сил, контролируя все новые регионы. Каждая из них теперь преследуют свои личные цели, стремясь к мировому господству и доминированию. Естественно, что крупнейшая из них никогда не останется в проигрыше.
Главный герой игры, Джон Далтон, в прошлом военный пехотинец, работает на организацию TCA (Terran Colonial Authority) в должности космического шерифа. В районе космоса, называемом "Олд Вэст", Джон и его команда в одиночку патрулирует планеты для сохранения мира и спокойствия на непокорной территории. Пока не сталкивается с таинственными артефактами, которые так желают получить стырае знакомые Скары (Skaarji) и другие цивилизации.
Unreal и все, все, все
Unreal Engine третьего поколения творит чудеса, местами пугая Джона Кармака c вечно цветущим DOOM 3. Любопытно то, что версия движка (который старательно патчится и модернизируется Epic"овцами) Unreal 2 отличается от UT 2003. Хотя нумерация U и UT движков немного разняться, и U2 вышел позже, выглядит он никак не краше UT2003. От этого создается странное впечатление, вроде и Epic была рядом, а и не обратила внимания на такую важную деталь. Как стало популярно в последнее время, все игровые ролики сделаны на движке игры, что, стоит признать, в отличе от того же "C&C: Generals" выглядит на уровне. Игра встречает вас странным logo-интро в духе "Aliens", знакомящим с названиями студий разработчиков и издателя. Далее скромное, но весьма стильное меню, отсюда советуем заглянуть в настройки, ну а дальше, вперед, к NewGame.
За что больше всего хвалят и будут хвалить второй Unreal, так это за грамотный и чрезвычайно красивый дизайн игровых миров. Все планеты уникальны, у каждой своя экосистема, абсолютно различная с соседними цивилизация, свой дизайн построек, свой ландшафт. Например, планета "Acheron" - это огромный организм, живущий своей жизнью и таящий в своем чреве множество секретов. Вымершая пустынная "Sulferon" с огромными скелетами древних жителей и большой базой посередине карты. Туманный "Janus", на который никогда не попадают лучи солнечного света из-за густого тумана. Холодная "Hell", на которой всегда идет снег, с крыш огромных зданий свисают ледяные сосульки, по снежным полям бегают забавные звери, а в лабораториях проходят опыты над плазмой. Но самые интересные цивилизации расположены на "NaKojaAbad" и "NC962". Миры Drakk"ов - существ о которых люди практически ничего не знали. Темные, мрачные планеты, немного напоминающие зеленый мир матрицы, на самом деле здесь проводят нечеловечные эксперименты. Воистину Legend обладает невероятным мастерством по созданию невероятных миров, Миров с большой буквы. Жаль, что игра слишком коротка. Всего удалось насчитать 23 игровых эпизода, из которых 12 реальные action миссии, а остальные - пребывание на корабле. Прохождения Unreal 2 не должно занять у вас более 10 часов, а если от них отнять сюжетные и "космические" вставки вместе с путешествиями по Атлантису и разговорами с NPC, то останется просто ничтожная часть реальной игры. Впрочем, к Unreal 2 хочется возвращаться вновь и вновь, хотя бы ради того, чтобы посмотреть на потрясающую фигуру вашей верной напарницы, Айды.
Кроме стандартного kill"em all в игре встретятся миссии вроде защиты неприступного форта на планете Kalydon от вражеских штурмовиков, охрана нервного программиста на Sulferon"е и еще несколько подобных ситуаций. Все эти мисси реализованы по аналогии с Wheel of Time, где приходилось защищать крепость от нападения злобных магов и монстров. Оборонительные миссии немного разбавляет однообразное брожение по планетам в поисках очередного артефакта и добавляет чуть-чуть стратегического мышления, конечно не на уровне easy. Среди средств самозащиты преобладают энергетические поля и монтируемые mashine-gun или rocket luncher установки, которые Маршал носит на своей металлической спине. Видимо, гравитация способствует. Сами уровни (карты, арены, как хотите) хотя и обладают огромными размерами, сохраняют линейность и однообразность прохождения миссии.
Unreal 2 достойна отдельного игрового Оcкара за визуальные эффекты. Будь это дождь, снег или палящее солнце, все выглядит превосходно. Вода в Нереальном мире прекрасна, и даже нынешний лидер в лице C&C: Generals уходит в тень, завидев великолепные волны Unreal"a, нагоняемые легким бризом.
Радует, что разработчики из Legend серьезно отнеслись к такой немаловажной детали, как изображения космоса и космических объектов. Дело в том, что многие текстуры были официально сделаны на основе фотографий NASA. Хотя иногда заметны огрехи: то разработчики оставили абсолютно черным угол (таких теней не бывает), то к тусклой лампочке привинтили страшную текстуру, а то и на звездном небе видны швы. И эту игру делали четыре года! Однако самого большого нарекания достойны зеркальные поверхности, точнее их отсутствие. Отражения в иллюминаторах, зеркальных предметах, стеклянных объектах и компьютерных экранах это всего-навсего прозрачные текстуры не всегда отвечающие тому, что они должны "отображать". Естественно никаких отражений главного героя, рядом стоящих врагов или NPC и прочих двигающихся механизмов они не в состоянии показать. В alfa-версии Domm 3 зеркало в уборной тоже имело некоторые ошибки, но все же было намного ближе к реальности, нежели зеркала U2.
Еще один забавный казус. Космический корабль Atlantis нам показывают в разных ракурсах и со всех сторон. Но, столь часто перелетая с одной планеты к другой, часто приходиться наблюдать наш звездолет в одном и том же положении...
Трое в лодке, не считая Ne"Ban"а
Экипаж Atlantis"а составляют три человека. Собственно сам Джон "Маршал" Далтон, девушка с мрачными воспоминаниями и напутствующими брифингами - Айда (Aida) и главный слесарь-ремонтник, мастер по оружию - Айзак (Isaak). Кроме трех представителей человеческой расы на корабле присутствует пилот-ас На"Бан (Ne"Ban), эдакий синий колобок в стальном костюме. Все NPC выглядят вполне естественно, качество текстур и количество полигонов, потраченных на их внешний вид, заслуживает похвалы. Хотя и тут у разработчиков вышла промашка, что само по себе странно, после увиденного в UT 2003, движения героев часто выглядят очень неестественно, а резкие повороты на 90 градусов откровенно пугают. С анимацией смерти также вышел казус - хваленая технология Karma в U2 почему-то оказалась сильно урезанной даже с выставленной на High опцией. Да и трупы, самым наглым образом оставляя на своем теле "энергию", служащую для Маршала броней, постепенно растворяются в пространстве. Неигровые персонажи в U2 существуют не только для брифинга и обсуждения нового оружия Джона, у каждого из них своя история, свои взаимоотношения и даже свои эмоции. Постепенно проходя миссию за миссией, возвращаясь на корабль (который, кстати говоря, можно излазить вдоль и поперек) персонажи ближе знакомятся с вами, делятся своими мыслями и размышлениями. При первом прохождении игры может сложиться впечатление, что диалоги, которые можно выбирать для общения с NPC, на что-то влияют и игра кажется нелинейной. К сожалению, это не совсем так. Персонажей U2 можно сравнить с героями "Звездных Воин" (IV-VI) или "Звездного Пути". Они также путешествуют на небольшом космическом корабле, тут есть и свой Люк, Лея, Соло и даже Чубака. Единственное чего нет, это Лукасовской атмосферы. В общем, сюжет и персонажей U2 можно смело сравнивать практически с любым фантастическим блокбастером, с тем же Вавилоном или Стар Треком.
Звуки нереального пространства
Музыкальное сопровождение нереального мира хотя и является весьма качественной работой, но далеко не всегда подходит к рассматриваемому проекту. В игровом процессе U2 совмещает несколько модных жанров - breakbeat, иногда легкий industrial и попсовый techno. Отдельно идут музыкальные темы космических сцен, вылеты Маршала в очередную горячую точку, либо спасение последнего из враждебных передряг сопровождается симфонической музыкой, вызывающей ближайшие ассоциации - "Чужие", "Звездные войны", либо та же Aliens vs Predator, баловавшая нас подобными творениями.
Не саблями едиными
Оружейный арсенал U2 довольно большой, хотя во многом повторяет идеи ближайших коллег. Подробно описывать каждый "ствол" нет смысла, но выделить особенности, пожалуй, стоит. Из стандартного набора присутствует энергетический пистолет, дробовик, уродливая снайперская винтовка, ракетница. Помесь Shock Rifle c палочкой-выручалочкой Хищника (AVP 1,2) тут называется Shock Lance.
Довольно оригинальной оказалась находка Гранатомет, стреляющий на выбор одним из шести видов гранат. Почти все гранаты великолепно взрываются, напоминая праздничные фейерверки. Есть в U2 и обещанный огнемет, использование которого превращается в отдельное шоу. Разработчики создали наиболее реалистичное пламя в игровой индустрии. Обработанные огнеметом враги громко кричат и бегают из стороны в сторону. Ближе к концу в арсенал добавится интересная вещица Drakk Laser Rifle, мощнейшая энергетическая винтовка расы Дракк.
Быть или не быть?
Кроме самой игры в набор U2 входит текущая версия UnrealEd (редактор карт), призванная продлить жизнь игры, а также утилита, позволяющая изменять/переводить игровые диалоги. Все это должно продлить игре жизнь в случае если mod и level-мейкеры обратят на нее внимание.
Как ни странно, при всей оригинальности родоначальника, играбельность Unreal 2 сильно напоминает игры, вышедшие задолго до нее. Удалось прощупать Half-Life, немного Red Faction, вспомнить об Unreal Tournament и местами даже C&C: Renegade. Истинно верю, что разработчики к этому не стремились, но так получилось.
Unreal 2 нельзя назвать плохой игрой, это несомненно хороший проект, очень красивый, возможно если бы не ностальгия за Unreal, если бы не закос под Tournament, если бы не Legend, то все было бы по-другому. Тем не менее, U2 - качественная, современная FPS высшего сорта. Что будет дальше? А дальше будет небольшая череда патчей U2, новый UT2004 и конечно секретный суперпроект от Epic Games, который обязательно вернет любовь к этой замечательной студии. Во всяком случае, я в это верю.
Советы:
Хотя версия движка, на которой сделан Unreal 2 и является довольно стабильной, в нее все же забралось несколько удручающих ошибок.
Хотя разработчики вовсю хвастают поддержкой 6.1 и EAX звука посредством использования второго Audigy, настоятельно рекомендуем отключить функцию EAX. Кроме того, что вы избавите себя от ужасных звуковых эффектов, вы добавите 5-10fps и сохраните стабильность игры.
Хронология серии UNREAL(PC):
- Unreal- Epic Mega Games, 1998.
- Unreal: Return to Na-Pali - Legend Entertaintment, 1999.
- Unreal Tournamet - Epic Games, 1999.
- Unreal Tournament 2003 - Digital Extremes, 2002.
- Unreal 2: Awakening - Legend Entertaintment, 2003.
Mission 1 - Sanctuary:
- Part 1: Sanctuary mining complex entrance -
Once your ship has landed go through the door in front of you. The room you enter has a door on the end, but you won"t be able to open it. instead you will have to go trough the tunnel on the right. Once you get to the end of the room you have to fight against a few Izarians. The easiest way to kill them is using te alternate fire of the D.U.S.T.E.R. it will kill them in one shot. When you killed the Izarians a guy will start talking to you and open the hatches on the floor in the room with the camera. Go through one of the hatches and swim till you find the exit. On the upper level there will be another 2 groups of Izarians. After that you need to go up the ladder. Be carefull as some of the Izarians will attack you while your climing. After that go through the door at the end of the long hallway. In the hallway it"s wise to use the explosive things to kill the Izarians you come across. when you went through the door the new level will load.
- Part 2: Sanctuary mining complex -
Unlike what that guy says the coast isn"t clear at all. kill the creatures and crawl through the malfunctioning door. in the next room there will be a lot of Izarians kill them and move to the elevator at the end of the room. Once you have killed the Skaarj that destroyed the elevater go to the elevator next to the destroyed one. Don"t forget to get the armor and health under the stairs once your up, you will need them. There are 2 more skaarjs coming at you when you get outside. When they are dead take a look around there and search the ammo in the field, it will come handy when you enter the next part of this mission behind the door.
- Part 3: Sanctuary Power plant -
Go outside ad kill everything, when you passed a small bridge go to the left first to get some goodies. then go to the right of the building, be aware of the skaarj hiding in the beautiful surroundings. Then you"ll see a scripted event where the guy that has helped you is being killed. Just go on, open the hatch on your way and go through it. Then open the door that leads outside and walk straight ahead till you see a door on your left. Now just walk on to the elevator and use it to go to an upper level. There you will meet 2 Skaarjs. Receive them nicely with your grenadelauncher and go through the door at the end of the hallway. There you will see a door on your right, but you won"t be able to open it. Instead, walk further into the hallway untill you can"t go any further. On the left you will see a D.U.S.T.E.R, some ammo and a hole in the ground. Go through the hole and watch out for the skaarj. At the end of the tunnel you"ll see a bunch of holes on your right. Crawl through th e one of the holes(preferably the ones in the center). ones you are under the floor you have to crawl to the only hole that leads above the ground. It can be found close to the tunnel in the center. Go through it and kill the skaarj. The room you are now contains two switches on your left if you are looking at the big computer. Switch them and go to the computer it will show you info about the creature in the reactor. Once it is done with informing you switch the override button on the right of the computer. Now go back outside. once you are out side follow the path to the right and find your way down into the reactor. When you"re on the floor, find the artifact and grab it. Now a big skaarj will come after you. Kill him with grenades and after that use the elevator in the center of the reactor to get upstairs.
Mission 2 - Swamp:
Go straight ahead to the little pond and head left along the "path" and look for the first marker that will direct you to the crash site. The markers point you in the right direction with their light beams.
Once you get to the crash site you"ll have a conversation with one of the marines. Be sure to get the M700 Shotgun, ammo, health, and shield pickups that are on and around a crate close by.
When you"re done talking and have the shotgun, follow the marine with the medium combat armor. When he stops and says to get down, don"t worry - you won"t get attacked here. But lots of Izarians will attack you when you go a little past the two boulders. When fighting them, use the shotgun or the CAR. It doesn"t really matter which. Just be sure to dodge the Izarians" EMP attacks - the large energy balls that they shoot. When you see one of these coming, get out of the way fast. Be sure to stay a ways away from them, as the EMP blasts have a blast radius that will still hammer your shields.
One the main marine starts moving again, follow him. You"ll be fighting more Izarians along the way, so just combat them like you have before. When you get to the area that the Atlantis can set down in, grab any supplies you need from the little stockpile. You can guard either end of the clearing, but I"d recommend guarding the one that the marines don"t deploy a turret beside.
Here you"ll probably be fighting alone most of the time, but the marines will come and help out now and then. Here you will be fighting both Skaarj and Izarians. Kill the Izarians like you have been, but be careful with the Skaarj. The primary fire of the CAR doesn"t do much good, but the grenade launcher, alt-fire of the CAR, and the shotgun do fairly well against them. Just dodge when they get close. All you need to do is survive the Skaarj and Izarians until the Atlantis arrives. Just watch your health and shields. Resupply both between waves of opponents.
Mission 3 - Hell:
- Part 1: Hell Descent -
When your ship has landed go through the cave behind you. when you past the cave go to the bridge on your right. Don"t run past the creature on the bridge. Instead walk or crawl, so it doesn"t wake up, unless you want to kill it. Now go through the hatch at the end. The elevator will take you into the building. Once you are down go through the door and walk straight ahead through the door at the end.
- Part 2: Hell Discovery -
Now that the new level has loaded walk to the left. The first door you see contains an elevator to make your way to the first floor. Now walk to the big door on the opposite side of the flames. Don"t forget to grab the flamethrower near one of the dead bodies. Walk through the door and go on till there is a bunch of flames in front of you. Now go through the door on your left. Heal the only guy who is still allive by pushing on the button next to the place where he lays. When the talking stops go back to the elevator at the start. When you are out of the elevator, follow that guy who you healed through the control room to the next elevator. Before you go in the elevator you might wanna get the weapons near the boxes on your right. When you are down go through the door and just walk ahead. In those big halls you will meet your new enemies for the first time. The small spiders die by one shot with the dispersion pistol and the big ones can be finished with 2 shots of your shot gun or one toxic grenade. When there is a combination of the 2, the flamethrower proves to be very usefull. Just go on and follow the halls and go through the doors till the next level loads.
- Part 3: Hell Desolation -
Now that the new level has loaded the fun can continue. walk to the right and go through the door on your right. Watch out though cause there are some spiders there. When you killed then all go to the elevator behind the small door. When get a good gun before you go to an upper level, as there will be a few spiders waiting for you. Once you are upstairs go to the right again. When you can"t go any further you will see a broken fan. Go through it and get the flamethrower cause you will need it there. now turn right and walk on and follow the way to the right. Walk on till you see a window on your right. Push the button next to the window and go back to where you came from. When you are out of the fan follow the road and pass the elevator where you came from. Go on till you get to a door. go throughfollow the hall till to get to the door at the end. When you finished all the little spiders in the next room go through the door on the other side go further up with the stairs and you"ll get to a room with a lot of spider pods. kill the spiders and go through the door that can be found another level higher. You might wanna use the grenade launcher or shotgun for the big spiders in that room. when you killed the big spiders go to the left first for some armor and ammo. and then to the right for some health. When you got all the goodies, go through the door on the other side of where you came from. Get to the end of the hall your in now and go into the elevator.
- Part 4: Hell Disclosure -
When the new level has loaded go to the upper level using the elevator. The other door in this room has to be unlocked first. The room you are now in contains an elevator and a broken door. The elevator will bring you to the control room where you have to be, but there are some obstacles in your way, so you have to go through the broken door and get upstairs via the obstacles. When you are in the control room push the 2 buttons in there and go back down to where you started. Now go through the door that was locked at the start. Walk through the hallway and go through the door at the end. Followthe path to your right untill you see another door on your right. Go through at and walk straight ahead to the elevator at the end. Now use the 2 elevators to get in the local control room and push all the buttons there. now get one level lower using the elevator and notice the 3 doors in front of you. Go to the left door for some ammo and health and then through the one in the middle. The room where you are now contains a hole in the center. Go through it, kill all the little spiders and get to the end of the tube. Before you get out on the right, get the flamethrower, you will need it. The hall you you are now, contains a door in the center. Don"t go into it yet, get the ammo at the end of the hall first. When your through the door, follow the hallway to the elevator at the end. Again use the 2 elevators to get in the local controlroom. in the control room. push the 4 buttons on the left one by one so the creatures get out. they will kill the big spiders for you so you won"t have to kill them yourself. Now push the button in the center to unlock the doors on the level below you. go one level lower and go through the door on the right and get through the hole in the floor. follow the follow the hole untill you get in a room with a lot of toxic waste in it. In the center of that room is a small passage. Go through the hole at the end of that passage. The artifact is in the beam that needs to be shut down, but before that you will have to kill the queen with everything you have. When you have killed her push one of the buttons that can be found near the beam and take the artifact.
Mission 4 - Acheron:
A third artifact has been located, and guess what? you are to retrieve it!
Ok first of all you land on the living planet, but you accompanied by a full alarm, that has bee activated because your dropship is spotted. When the mission starts you should see a truck to your left hand side and further up the road another truck, BEWARE they dont look at innocent as it looks! As you move up the road there"s a Merc with a CAR behind the first truck. Take him out and move on up, Ahead of you should be some red boxes and the 2nd truck, carry on going up the road, once there you should come across at least 3 Merc"s, Each one has a different weapon, once they are killed you want to head to the back of the truck were a Ammo/Health/Armour supply is located, I suggest that you save it inside there. Ok now coem out of the supply section and go left, go forward and squad of Merc"s called Tiger 6 will appear from the elevator. The elevator is to the right of where you are, dont goto them, let them come to you, but if you cannot wait then Grenade Launcher there ass! When they are done and dusted with you should see a platform that will aquire you to go up a ladder to get to, but before that you want to destroy a Rocket Turret. When that is destroyed move up to the ladder and climb up it carefully - this is due to there around 5 marines up there which you will have to kill of course. When they are killed you want to heal yourself using the Health powerup, near that is a radio which you want to use! The reason for this is that you need the Elevator to come up, when you use the radeo a Conversation tree will appear press button 2 so the elevator will come up near the dig site. Before you proceed to the elevator i suggest you save it where you are now. Ok now go down the ladder and to the Elevator, once there you should encounter some Merc"s...."wipe them out...ALLLL of them". Finally go to the elevator and get a ride down.
When you get to the bottom yuo then want to proceed forward, be careful as there are some Merc"s around there. Anyway move out down the cavern, be sure that any Mercs that you encounter you kill as you dont want to die just yet. As you go forward from the elevator you should come across 2 mercs and 1 Heavy merc, take them out and carry on going forward, as you go a merc starts to speak and tells his men to be aware..blah blah blah, anyway just carry on going forward and kill all mercs you see. While going forward you should come across what looks like a flood light that isnt on - near there is some Health and Armour pickups PLUS some ammo, make sure you get what you need then carry on going forward. Further up ahead from that position the caverns width gets bigger and you start to go downhill so to speak of. Once there kill all merc"s that are around that area, if you goto the left hand side it goes up onto a platform with a Health powerup, use it if you need. If you look down from there you should see what looks like a egg with tenticles coming out of it, around that are 3 detonators that you will need to arm, once you have done that quickly run and hide, once they have exploded you then want to quickly go back and pick up the articfact. Once you have it, turn right and run in the opposite direction of the elevator that brought you down. Anyway turn left and run like you"ve never run before, dont stop for nothing and mindwhere you go because some blobs will chase you and the floor kinda like leaks..let the blobs swarm you, you dont need to attack them, just run like mad to the other Elevator, jump on the Elevator and watch it go all the way up. Once its up to the top it doesnt stop there, ohh no - you know have to run all the way back to your dropship. Anyway get up the elevator and make a run for your dropship. here"s a poor Merc trying to get a free ride...haha no for long!
Mission 5 - Severnaya:
Ok in this mission you have to save yet some more Marines, so lets get started. First of all when the game loads up start of by your ship, you then want to arm yourself with a powerfully weapon and expect to kill some Merc"s! Once you have got your weapon walk straight forward, as soon as you do a subtitle and sound will appear and you will then be able to hear the Merc"s and the Marines. You should be able to see where you have to go and the path is noticable, as soon as you go around the corner you then have to walk up a small hill, once there you will be able to see the marines to your right behind a rock, if you carry on walking forward the Merc"s will appear to your left, take them out. Once that is done you then want to speak to the remaining Marine, he rambles on abit and then gives you some ammo and tells you that his friend had a sniper rifle, after he has told you he then goes on about how the have bombs on the dam - which then becomes your mission! The marine then runs off to your shuttle and waits there for you to successfully do the mission. Once you have the sniper rifle you then want to take up some high ground and make sure you are able to see the bridge, if you can see it!? you should be able to see two guards walking to the left and right of the bridge, take them out! Once that is done two snipers will appear on the balcony, be sure to take them out as you should have enough ammo and high ground to see them. Ok that is done, you then want to get down from where ever you are and then then goto the left, you should see a path going up and then curving round to the left, follow that all the away around, once uve done that you should be at the dam, pick up the ammo from both guards. Once by the dam you should be able to see a big orange door, once you see that, look either left or right of it and you should see a set of ladders, go down them, once down them you should see yet another set, also go down them. Once there dont go no further, you should be able to see water pouring out of the dam, that is where you have to go but there is a turret and Merc in there, if you peak around the corner ("E" button) you should see both, to take them out i recommend using the Rocket Launcher to take them out, once you have taken them out you then want to walk straight up the water stream and then to the left where you should see a ladder go up that and over the bridge, i suggest you save it here! When that is done you should see a door up head to the right.
Once you go through a door, you will be notified that if you drop your arms, YEAH RIGHT! go forward through the door and you should see a set of stairs, go up them. Ahead of you should be some canisters, take aim at them, you"ll soon find out why you should use them; reason being is 2 Merc"s come out and start to fire at you, firing and blowing up the canisters will make your life much better. When they are dead you then want to go through the door way they came out of, notice the Armour pickup underneath the set of stairs, get it. Beware if you try to go up those stairs it wont work as all the doors are shut due to a certain someone! Anyway turn back ground and go down the first set of stairs you came too (the ones that took you to where those canisters are!) once at the bottom of those you will then have to look to the side of it and you should see a door, walk up to it and it opens automatically for you, once there turn left and straight on and climb the ladders. At the top of the ladders you should see 1 of 3 of the bombs, press the "USE" key (enter) and arm it, dont worry it wont go off....YET! Ohh btw Aida goes into a mad one saying how you shouldnt be there...like your gonna listen!
Once you have done that you then want to turn around and go forward (not down the ladder) you should be able to see a set of beams going vertically up, behind them is a ladder, go up it, once there you then want to find another ladder which is located at the far end of the level your on, be sure to duck underneath the Pipe. Once you have climbed that ladder you then have to go up another set of ladders which are located at the far end of the level that you are now on, once there you should hear Merc"s speaking, there is two hatchs located on the level, one goes to the room that the Merc"s are in and the other is to a door that takes you too that room, either way your going to have to kill the Merc"s, personally i used the grenade launcher at the first hatch...anyway take them all out! When that is done you then want to search the room and lockers for ammo, when that is done there is a switch a one of the ends of the room, (computer end) use that switch. This switch will unlock all the doors so that you can go anywhere.
At the other end of the computer you should see a door, go through that one and once you are at the other end you should see a door, go through it! once you are there you should hear beeps, the 2nd Bomb is located in this room, what you do is you jump across to the ledge in front of you, the bomb is there! Use the "USE" key and arm it, once you have done that you then want to go and jump down from the ledge at the other end and through some doors. Once you have done that you then want to goto the left, if you look the room is full of Pipes and that....BEWARE - Merc"s and Turrets there. some the merc"s are at the top of the pipes (not hard to spot them). You want to goto the left of the room, once there you should see a turret and a set of Field Generators, be sure to destroy them and any merc"s in that area. When that is done you then want to go up a set of platforms, once and the top there is a dome like feature, go all the way around it but also beware there is a turret which is located on the ground floor, once you have seen it and located it, a merc then places a field generator on the bottom floor that stops you from gettings to the other side of the room, use the EMP grenade to destroy that and then take out the Merc, go through the area and be careful as there is also a turret at the left, destroy it quickly. Once that is done you should see some pipes arranged like some stairs, goto the top of them and walk all the way across and you should see the 3rd bomb, before you arm it two things -
1) To the left of the bomb there is a set of pipes you have to climb up to get out
2) Save before you arm the bomb
Anyway once the area is secure arm the bomb and go up and over the pipes, once you have done that you then want to kill any Merc"s that appear, once that is done you then want to forward. You should then see the yellow/orange doors, once you see them that is your way out, you then want to press the switch which will lead up outside, BUT outside there is a turret and a merc you need to destroy (both located to the left), once you have done that you have 5 MINUTES to get all the way back to your ship!
Now all you gotta do is just sit back and enjoy the cut-scenes
Mission 6 - Kalydon:
This is a very frustrating defense mission let me just say that straight away. When you start the game Isaak show you the ropes, he will show you how to work the field generators, Once he has showed you how to work them, he then mentions that the weapon droplanded somewhere else, so you then have to go and find it. Ok Issak is done and he goes back to fix the Atlantis, the mission begins. Now then pick up all of the field generators that Issak put down using the "Use" key (Enter) and head to the left side of the mountain range, go to the cache, pick up the sentries and generators and head back, try and be as quick as you can as you have to set up the parimeter! Place the Field generators and turrets on the left side and let the merc"s be able to enter through one area (helps you out picking them off), but try and save two generators to cover the door, because you will need it! Anyway be sure to set up the Field Generators to the right of the doors, the Female merc"s come from both sides during the level. At first the Female merc"s will appear on the top of a hill that is located to the right of the door, Aida tells you that the Female merc"s are here, you should then be able to see the ship landing and dropping off the Female merc"s! During the mission aida will tell you when more merc"s arrive, you do have time between each wave of attact to quickly use the Energy and Health powerups that are located at the left and right of the Doors.
Now then be sure to save all your ammo and use your turrets and generators wisely and they will help you with the mission! Also be sure to save the game between each wave of attacks, unless you want to replan the mission.
Mission 7 - Sulferon:
You start out next to your dropship. You can see the Izanagi base not too farr off. You need to work your way into that base. But first you need to clear away the guards outside.
Go to the crate that"s to the left of the antenna in front of you. There"s a sniper rifle and a rocket pack. When you retrieve these items, you will most likely run into a medium armored Ghost Warrior. Take him out with the weapon of your choice. During your fight with this merc, or after you kill him, a heavy armored Ghost Warrior (GW) should be approaching over a small dune closer to the base. Take him out and close in on the base.
There will be a few turrets set up along the front wall of the base. Destroy them from a distance. The alt-fire EMP blast from your Shock Lance will make short work of turrets. Fire two of these blasts at each of them. Once the turrets and another heavy GW are eliminated, either go around the main wall to the left, to the right, of straight through. At the main entrance to the base you will most likely run into one guard. But don"t use the front door to access the base. Several guards and a turret await you. Instead, go around the left side of the base and use the back door. Take out the guard from a distance with the sniper rifle. But keep your distance from the base as you proceed to the back door, a heavy GW is hiding near it.
Grab the supplies outside of the back door and go in. Take cover behind one of the walls to escape the turrets. A medium GW is here. Wait for him to come to you and then kill him. Take out the turrets with EMP grenades. The hallways of this base are swarming with guards, so watch your back. Once done with the three turrets, go through the door near one of the turrets. You"ll be in a hellway. Watch out, a medium GW will come and attack. Once done with him, grab the stuff behind the crates and go through the next door. Three guards are in here. Take them out, grab the supplies, and go through the door on the other side of the room.
Another hallway. Take out the turret on the other side of the crate with whatever weapon you want. The turret is pointing away from you and can"t hit you. Go through the next door and keep going straight. A guard will jump out, so kill him fast. Open the door and use the elevator. Kill the two guards up here and hit the switch on the control panel. This half of the mission will end, taking you to the next.
You"re back in the control room with four friendly marines and the technician. Order all of the guards to remain in the control room. If you send them out to other locations they will die faster. Keep them together and guard the technician. Hang out and wait for the GWs to come in, or go out by yourself and take some of them out. The GWs will come through both the front and back doors in a few waves. Use your marines to help kill them. Just survive and keep the technician alive long enough for him to get the data. Once he"s done, the mission is complete.
* Note: There seems to be a small bug in this map at the part where you have to protect the technician. If you have waited more then 5 minutes after wave of enemies and there haven"t been a new wave of enemies. Then there might be one enemy warrior stuk somewhere in the map. You have to find and kill him before the map can be completed.
- Part 1: Outside Polaris -
Ok first of all, Immediately after you start the level you in the action, this is due to a Merc is firing at you with a Rocket Launcher from a nearby tower which is located to your right, just look UP! Anyway Quickly press "4" which should bring out the sniper rifle, Snipe him. Another guy in Heavy Armor is coming at you with a Rocket Launcher so dispose of him. Now at the beginning where you killed that Merc on the tower you will want to go there first after killing all that is around there, when you get to the ladder to climb up the tower there is a small rock formation, behind that is a merc so kill him before you climb, once you have killed him and made you way up to the top of the tower you want to stay up there and collect the Ammo and other supplies that are there. If you look around you should see a Merc, he is easy to kill, just snip him. Once you have made sure that you have killed all the merc"s around you want to go all the way back down to the bottom of tower. Move toward the bridge (Straight ahead from your dropship) BUT watch out, some Mercs will plant down a Turret and a Force Field, you quickly want yo get your duster out and kill the Merc"s that are around on the bridge, then quickly destroy the turret, i found that just before you get onto the bridge there is kinda like a curb, duck so that the bridge is in front of you and use the curb like feature as a cover spot, this will help you as you wont take alot of hits from the merc"s and turrets. Once you have killed the turret/merc you want to hop on to the bridge, you should see 2 big objects to your right and left, behind there to the right side are some ammo and pickups that you may need. Ok now you want to move past the heavy Truck, but watch out for the Mercs that will emerge behind it, once you pick them off a few other mercs will come up and will place Field generators and a Rocket Turret. Kill the Rocket Turret and destroy the Force Field and go forward. As you go forward some Heavy Merc"s will appear, take them out with your Rocket Launcher, after that there should be a light merc lurking around that you will then have to kill as well. once you have done that, continue forward, you then are inside a hanger like building, to the right there should be some steps, go up them and go left from there, carry on going forward, you will then come to a dead end, if you look to your left flank you should come across a lift also there is a ammo supply. Once done that flick a switch which is located to the right of the lift, this will open the lift doors and then enter the lift and press the button which is the far end of the lift!
- Part 2: Polaris Entrance -
Ok after the game loads up you should see a scientist ahead of you, go up to him and speak to him, he will then go on asking you who you are and you ask him to open the door! After that move further in, go through the door the scientist open and then through yet another door, once in the room you should see another door infront of you, inside that room is a merc that you will need to kill, after that move to the room with the huge crates, once in there you should encounter some Turrets/Mercs/1 Heavy Merc. Now then for the Turrets use your EMP grenades, then quickly get out your Assult rifle and use it on the rest. As you enter the room to the left is some supplies you may find useful, they are Grenades/Shotgun ammo/Health Pickup, these will be useful as you may take some hits during killing whats in that room. Once you have cleaned out the trash in the room you want to go the other end of the room (opposite the door you came in) there you will see a door that you have to go through.
- Part 3: Polaris Geologic Research -
After loading finishes, ahead of you there is a door, the button for the door is to the upper right of the door, move through the hallway and to the next door. To your right of the doorway there is a Health poweup that may come useful, Infront of the doorway on the other end of the room there is some ammo, to the left of the doorway is another door, before you open the door equip yourself with your EMP grenade and then pen the door, then fry the Turret that is right ahead of you. Then turn right and go staight on toward the door, go through it and inside there should be some mercs, but BEWARE to the left of the door is a small hatch that has a Turret inside, you need to destroy that and then walk through the hatch, on the other side is a lift, go up and then go to the left...there you should hear the merc torturing the scientist, drop down and kill them (not the scientist), when that is done you then want to speak to the Scientist who will then take you to the Artifacts, you would think he would give them to you but doesnt, anyway when he has got the artifacts and when the talking is done you want to go out the way you came in.....BANG, looks like you gotta find another way out, aida speaks to you and then the Scientist says he has a way out and you have to following him.
- Part 4: Polaris Geologic Research Exterior -
As soon as the game has loaded part four you then want to let the scientist open the door that is in front of you. go into the room and kill the Mercs that are in that room. Once that is done the scientist will then run to a door, the door doesnt work so you try another door. Once that has been opened you encounter a 3 Merc"s that you will have to kill. When that is done you will then have to go through the window the scientist opens and then go clear out the area to the lift because he wont come out unless its clear. Basically for this stage you carry on going forward killing all Female Mercs that you come across, there are a lot of Female Mercs with heavy guns and a few Turrets so watch out, a few good weapons for this bit is the pistol you got off Aida or the Duster. When you"re at the elevator Meyer will come there and you will go up.
- Part 5: Polaris Geologic Research Rooftop -
The next part is up to you. You have to defend Meyer while he messes around with the radio and what not. inside the area where he is trying to fix the radio, you should set up a parimeter, tell the marines where to go, below are a few pointers
Keep Heavy marine inside
Collect the Field Generators and Turrets
Save the game before the game starts
Block each entrance with a Field Generator
Tell your other mercs to guard the other places or tell them to guard inside
Mission 9 - Na Koja Abad:
- Part 1: Na Koja Abad -
When you have landed your first objective is to find the digsite. first walk straight ahead untill you see a strange lizard-like creature grabbing a winged creature that was lying on the ground. There you will have to go to the left. Now walk on untill you hear 2 izanagi ghost wariors talking with eachother. kill them preferably with the sniper rifle which kills them in two shots. there are also 2 automatic cannons on top of the portal. Take them out with emp grenades or the rocket launcher. The portal is shut so you have to find a way to open it. follow the road further in. when you are at the building watch out for more ghost warriors. 2 can be found further down the road and two on the left. The 2 warriors on the left were garding a door. Go through it. Heal yourself and grab the auto turret. there is also some sort of safe in the room. Open it and push the button in it to deactivate the fence within the portal you saw earlier. Now go back to that portal and take out the 4 ghost warriors behind it. Now walk on till you see a building in front of you. Take out the big merc with the rocket launcher and the small ones with the assault rifle. When you killed them don"t walk on just yet. there are 2 snipers in the building. use the sniper to find and kill them. Ok now just walk on untill you get to another portal. Open it by simply using the button next to it. On the other side there are 2 automatic guns on the portal. And there is a sniper on the bridge you can see. Take them out. There is and entrance to the building in the water. Go in there and the next level will load when you climb the ladder at the end.
- Part 2: Na Koja Abad Izanagi Xeno Research Facility -
When the new level has loaded climb further. When you are up, walk on and take the first way to the right. Climb the ladder at the end and walk on. There you will hear 2 scientist arguing with eachother. You have to get down there where the 2 scientist are, but before you go take out the guard. there are 2 doors in the room. Take the door on the left side of the computers. Walk through the hole and take the first way to the left. Don"t fall down. Instead walk to the other side via the small walkways on each side and make sure you don"t get hit by the toxic smoke. When you are on the other side, climb the ladder and go to the right. Around the corner there is an automatic gun. Take it out. and walk to the end. Around the corner is another automatic gun. Walk on. At the end there are some more scientist. Again kill the guard before you go down. This time there are 3 doors. Go to the one on the right of the hologram first for some health. watch out though as it contains 1 or 2 warriors depending on what skill you are playing. Now when you got the health go through the door on the other side of the hologram. Take out the auto-gun on the building in the center with the Rocket Launcher. Then kill the medium warrior on the other side with the sniper rifle. There is also a heavy warrior one level lower. take him out too. Now get into the building in the center and watch out for the 2 auto-guns. Use the ladder to get up and move on. There you"ll see another couple of scientists experimenting. Wait untill the experiment is over and get down. Go through the door near the fortified wall kill the 2 warriors behind the second door. Before you go down with the elevator take out the 2 auto-guns on the level beneath you. Now When you are down you might want to let a takkra drone defend you against rockets before you get through the next door. And take the rocket launcher as the next rooms contains one or 2 heavy Izanagi warriors. When you have taken them out, get to the end of the hall and use the elevator there to go to the next level.
- Part 3: Na Koja Abad Excavation -
When the elevator stops, you"ll have to go to the next elevator. Make sure you don"t fall dowm, as the second elevator is standing on its own. Once Down, take out the guard near the main entrance of the alien building in front of you. There is also a guard beneath the platform in the center of this cave. Take him out too. There are also 2 auto-guns under the platform near the main entrance. Destroy and get the goodies behind those auto-guns. Once you have all the ammo and health you can find. Get through the main entrance door. There are 2 guards in the round room. and 2 more are patroling the hall on the other side of this room. Take them out and go on. till you get to a room with some ladders. Before you go up take out the 2 izanagi warriors on the platform where the ladder leads to. Now climb up and walk through the passageway untill you are at the end. There are 2 izanagi ghost warriors a level lower. Take them out and get to the other side of the room by crawling under and jumping over those rays. There you will see another artifact. When you take it there comes another cutscene which shows a creature coming out of the thing behind you. The creature is actually a robot, therefore it"s best to use EMP grenades against it. When it explodes grab the thing that it drops and get back to the door where you can exit this alien building. Use EMP grenades to kill the robots that are trying to get the artifact back from you.
Mission 10 - Drakk Hive Planet:
- Part 1: Drakk Hive Planet -
When your ship has landed, all you will have to do is follow the only walkway around. Go through the door at the end of it and the next level will load
- Part 2: Drakk Hive Planet NC962VIII Scrutiny -
When you are in the building 3 or 4 drakk robots will attack you. They can be killed easily with EMP grenades or the shock lance alternate fire. Though I would save the ammo of those guns for the more difficult drakk enemies you will encounter further in the mission. Instead, destroy them with the drakk lasergun. At the end of this big room you"ll see aliens and humans in some sort of cage. There you can find some health and ammo too. Grab it and walk through the big door in front of you.
In the next room you see a new kind of enemy, 2 of them actually. I suggest killing them with 2 EMP grenades or alt-fire shots of your shock lance. When you shoot once the creature on top of the other thing will be dead and it won"t shoot back anymore. Though you better destroy that other thing too, as some of those robots will put another creature on it. Grab the ammo that those things dropped and go through one of the doors on the left and on the right. It doesn"t matter which one you will choose as both lead to the same room. Both contain 1 or 2 light drakk robots and 1 Medium robot.
Go through the door at the end of the hall you chose and kill the medium robot below. Jump on the platform where you killed it and go through on of the doors. Watch out for the 2 medium drakks in the small hallway. The hallway contains 2 strange buttons at the end I have know idea what they do, but you don"t have to use them. All you have to do is go to the thing with some fancy sparkle effects coming out of it. walk on it and you will notice that you start flooting up. Use this to go one level higher.There you"ll see another medium drakk robot. Destroy it, go through the door near it and the next level will load.
- Part 3: Drakk Hive Planet NC962VIII Subjugation -
Go through the door in front of you. Now you enter a room with a lot of ammo and some drakk experiments. Go straight ahead, untill you passed the second tunnel. A medium drakk will appear there, destroy it and head on. It doesn"t matter which way you go as both ways lead to the same place. Just keep going and grab the ammo you can see at the drakk experiments. Head on untill you get to a room with a cilinder-shaped building in the center. Kill all the enemies in the area and a door in that cilinder-shaped building will open. Go into the center of this building and the next level will load while going up.
- Part 4: Drakk Hive Planet NC962VIII Subordination -
When the new level has loaded, grab a usefull weapon immediatly to kill the medium drakk in this roon. Go through the only opening in this room. In the next room you"ll see another cilinder shaped building in the center, but a much larger one. Walk on and choose the path to the right first to get the ammo there. Then go through the tunnel on the Left. This tunnel contains a lot of rays that go on and of regularly. Make sure you don"t get hit by those rays while you continue you way through the tunnel. When you got out of the tunnel make your up and Locate the pickups near the creature in some sort of cage. load your guns with ammo and yourself with health and armor and make your way into the big building in the center of this room.
- Part 5: Drakk Hive Planet NC962VIII Solitude -
Go through the door in front of you, here you will meet the Drakk boss. Before you start fighting him, go to the pillars near the last artifact. You can use those pillars for cover. When you have hit the big boss a few times, it"ll split up in 2. In order to kill the boss you will have to destroy the thing that doesn"t shoot you with a red-yellow kind of ray. Destroying the other thing is a waste of ammo, since it will be reproduced. Use the pillars to cover from the red-yellow rays. When you killed the boss, grab the artifact and the mission has been accomplished.
Mission 11 - Avalon:
After a brief cutscene, you find yourself having crash-landed near the TCA HQ. Aida informs you that the Skaarj have landed at the facility in force. You need to clear them out. Head for the tower. At the bottom of a small hill you"ll find a dead marine. Some shotgun ammo and a sniper rifle are on the ground next to him. Climb the next rise and you"ll run into a heavily armored Skaarj. Dodge his energy blasts and hammer him with rockets or a toxic grenade. Continue toward the tower. A more lightly armored Skaarj will come from behind a boulder on the left and chase you. Dodge him and get him with your flamethrower or shotgun. Don"t waste rockets on him. Get up to the destroyed turret. On the left down by the water are two Skaarj. These Skaarj have no armor. Use either your flamethrower or the Araknid gun"s primary fire on them. They will run around screaming like the human mercs from earlier missions.
Tip: If you"re having trouble evading the Skaarj energy blasts, use the alt-fire of the Takkra. They will shoot down the incoming projectiles before they reach you. But use only ONE at a time.
After killing the two Skaarj, move over to the base of the tower and follow the path on the left. Watch out, a Skaarj will ambush you here. Proceed to the stairs on the right and go up to the elevator. Ride it up. Once it stops and lets you out, there is a Skaarj off to the right holding a marine. Shoot the Skaarj with a ranged weapon and continue up the stairs. At the top, an unarmored Skaarj will come from the stairs leading up into the tower. After dispatching him, go up the stairs and pull out you rocket launcher or grenade launcher with toxic grenades. Look through the window to see two Skaarj. When you open the door, they will come after you. Shoot the closer one with rockets and then fall back. The other one will chase after you. When he comes through the door, fire rockets or hit him with a toxic grenade. When both are dead, get into the control room and deactivate the planetary cannon. The controls for it will be highlighted on your HUD.
Aida will inform you that there are some marines nearby. Get back down to the elevator and hit the button. The main power and backup power is out. Get out of the elevator and go left. There you will find a sniper rifle and plenty of ammo. Zoom in on the door down by the fire with your scope and locate the marine. He will go and fix the generator, but you need to cover him by sniping any Skaarj that come after him. Keep a sharp eye out. Be sure to reload after every wave. When the Heavy armored, slow-moving Skaarj show up, kill them by shooting the explosive canisters when they walk by them. When the marine is done, you can take the elevator to the ground. There you will meet up with the marine. Follow him and provide cover. A Skaarj will come from the right behind the tower as you go, watch out. Along the path over the water, a pair of Skaarj will come down the hillside ahead and attack. Try taking them out with the sniper rifle before they get too close. As you travel up the hillside, you will run into a heavily armored Skaarj that comes from the left. The marine will most likely die in this encounter, but don"t worry about it. Continue up the hill towards the pad and you will meet up with two more marines. Skaarj ships will come to drop off more Skaarj. Follow the marines. They will set up turrets and a generator fence. Stock up with the supplies nearby and wait. The Skaarj will come in waves of four heavily armored warriors. The generator wall will fail fairly quickly, but there"s little you can do about it. Nail the Skaarj with rockets to take them out quickly. Avoid their energy blasts. Once you"ve taken out all the Skaarj, you will enter a cutscene before entering the next mission.
Mission 12 - The Dorian Grey:
After the tragic scene witnessed from the surface, you are picked up by The Dorian Grey, Commander Hawkins" flagship. In this first area, just grab supplies from either side of the room and watch what happens. When you"re stocked up, go back and stand where you were when you entered the level and watch what happens.
When the Tosc breaks free, begin hammering it with your tougher weapons. Hide behind the two pillars in the middle of the room and shoot at it from behind them. As long as you stay behind these and don"t give the Tosc a shot, you"re all right. Hammer it until it drops its Singularity Cannon, which you will see in a brief cutscene. Lure the Tosc away from it and then circle around and grab the Singularity Cannon and shoot the Tosc with it. This is the only way to kill a Tosc, so be sure to use it on them. When you kill the Tosc, go through the door that is straight ahead and to the right of where you first entered the level. This door is now open for you. Go through the first door on the left. Here you will enter a cutscene.
After the cutscene, go through the door ahead and go up the ramp for another cutscene. Afterwards, turn around and go through the door at the end of the room. Here you will find another Tosc. Take care of it with the Singularity Cannon and go through the next door, then the next. Here you need to go straight ahead and go right on the ramp. Watch what happens to the marines and kill the Tosc.
Go around and get on the broken catwalk. From here you need to get up to the place the Tosc was standing. Use the anti-gravity to your advantage, but be careful. Use the little ledge next to the balcony to get up by jumping up to the ledge, then to the balcony. Once you get up there, go through the door at the far end of the hall and then the next. In this area, go over to the generator sorta things. Use the low gravity to get up to the higher door and go through it. Take the door on the right and go down the hall to the next door, and then the next. In this room go toward the door, but don"t enter it. Two marines will come through one of them and have a conversation.
Now go through the door and take care of the Tosc. Then jump up to the second level and go through the door. Continue through the next few doors. The ship will completely turn on its side. Jump up to reach the door buttons
From here on. Once in the cylindrical room, take out the Tosc and make your way to the other end of the room. The escape pod is on the bottom side. Go to it to finish the game.
Written by: --, Eightball Maniac and GaboonViper
Игра:
Жанр:
FPS
Разработчик:
Legend Entertainment/Epic (http://www.legendent.com)
Издатель:
Infogrames/Atari (http://www.us.infogrames.com/games/unreal2_pc)
Минимальные системные требования:
Windows 98/Me/2000/XP, Intel Pentium III or AMD Athlon 733 MHz processor, 256 MByte RAM, 32 MB NVIDIA GeForce2 MX, 3 GByte free HD space, 8x Speed CD-ROM, DirectX version 8.1
Рекомендованные системные требования:
Windows 98/Me/2000/XP, Pentium III or AMD Athlon 1.2 GHz (на самом деле и 2 Gh будет мало), 384 MByte RAM (лучше уже все 512 MB RAM), 64MB NVIDIA GeForce3 or ATI Radeon 8500 (в идеале Radeon 9700 Pro).
Количество CD в оригинальной версии:
2.
Поддержка multiplayer:
нет. Оценка автора:
8/10
 Согласитесь, на свет выходит мало игр, которых ждут, черкая дни в календаре до даты, на которой уже заботливо начертано красным маркером слово релиз, который многократно откладывался, из-за чего красными словами релиз исписан весь календарь. Их можно, без всякого преувеличения, пересчитать по пальцам. Альфы и беты этих игр в обязательном порядке "недобросовестные" сотрудники/друзья/знакомые выкладывают в Инет для того, чтобы народ смог оценить потуги программеров проекта. И даже последний диал-апщик начинает издеваться над своим модемом, скачивая дистрибутивы на сотни мегабайт. Упоминать про ежедневное разглядывание тех немногочисленных скриншотов, которые пиарщики паблишера таки выкладывали на игровые сайты, я думаю, не стоит.
Ну, а говорить про то, что пираты зарелизят у нас игру раньше на 4 дня, чем состоится официальный релиз "за бугром", я просто не буду - как-никак, это все обязательные пункты программы.
Ну, а теперь припомним виновнику сегодняшнего торжества еще и то, что делали его аж целых 3 года (а если считать младенческие забавы вроде скетчей, концепции и прочих "бумажных" изысков, то все 4). Фанаты завопят, что ждали его с того самого, далекого 1998 года, когда вышла первая часть шедевра. А также не забудем и то, что злостные дядьки из Infogrames нарочно придержали релиз еще в середине 2002 года, боясь за продажи своего детища из-за Unreal Tornamet 2003, который уже начинал свой победный путь по прилавкам с дисками. Сославшись на "...вынужденное тестирование", релиз придержали - и вот два заветных диска с игрой у меня.
Нереальная красота
Стилизированные менюшки игры смотрятся просто замечательно, доложу я вам: все красиво вертится, крутится и не режет глаза своей вычурностью. Ролики разработчиков на движке игры тоже неплохи, но не об этом все речь... Первое, что мы делаем, запустив игру, смотрим на ту графику, которую ждали так долго. Смотрим, смотрим еще раз, ставим Detonator XP 41.09 (на котором, как честно сказано в readme, тестировали игру разработчики), избавляясь от глюков на моделях персонажей, смотрим опять и понимаем, что ждали не зря. Графика у Анрила за номером 2 удалась, и пока она меня впечатлила больше, чем даже графика в альфе Дума 3, но тут у последнего имеется большая фора. Сырая альфа Дума 3 с весенней E3 еще не демонстрирует детище Кармака во всей красе, а вот движок эпиков уже показал все, что может. Прежде чем перейдем непосредственно к препарированию игрового движителя, я приведу свою конфигурацию, дабы читатель смог оценить уровень "прожорливости" игры:
- Intel Pentium 4 Northwood 1.6 GHz @ 2.3 Ghz (143x16) на SiS 645
- Nvidia GeForce 3 TI200 @ TI500 128 MB DDR SDRAM
- 256 MB DDR SDRAM (CL=2)
- Seagate Barracuda ATA 4 40 Gb
- Windows XP SP1, DirectX 8.1, Detonator XP 41.09
Скажу сразу: покупайте 512 метров мозгов. Без этого количества памяти играть становится крайне затруднительно. Игра начинает жутко свопить, делая игровой процесс неимоверно трудным. 
Превозмогая всевозможные охи да ахи касательно неимоверного числа полигонов, отсыпанного на модельки персонажей (Айда, ах какая там была Айда), и не всматриваясь в пестрящие краски исследуемых планет, мы можем смело констатировать - двигатель Unreal 2 существенно не шибко отличается от движка Unreal Tournament 2003. А поэтому мы можем только повторно похвалить этот замечательный движок и перейти к прославлению дизайнеров уровней, которые, слава богу, не дали пропасть работе программеров движителя и скомпоновали все как нельзя лучше. Каждая из планет, которую будет исследовать сам Джон "Маршал" Далтон (бывший морпех, отличник боевой и политической подготовки, ходячая энциклопедия анекдотов и просто харизматичный главный герой), выглядит по-своему уникальной и запоминающейся. У каждой своя флора, фауна, антураж и, что самое главное, в игре нет "штампов", на которые просто уже невозможно смотреть, запуская очередную поделку...
Прибавьте сюда еще и звук, который полностью EAX и дает вам почувствовать, что сумасшедшие деньги, потраченные на вашу акустику, выброшены не зря, который поражает воображение и тоже страшно глючит и стопорит всю игру и к которому надо присобачить патч, дабы можно было не наблюдать падения производительности на 10 фпс. А в остальном у нас здесь полный порядок.
Но это была ода графике и звуку...
О штампах
Геймплей же оказался не тем, каким его ждали миллионы фанатов Unreal"а. Вместо вселенной Unreal, нам подсунули искусный пазл из всех хитовых экшенов последних года-двух. Да, надо признать, сделано все очень хорошо и профессионально, но примут ли фанаты притянутую за уши вселенную Unreal к, в общем-то, банальному шутеру, коих в достаточном количестве сейчас на рынке? Но тем не менее "учителя" были именитые: Half-Life, Halo, местами Star Trek: Voyager и даже Red Faction вместе с C&C: Renegade. И это только то, что приходит на ум в первую очередь.
Но самого главного у игры не отнять - вы погружаетесь в геймплей с головой. Команда звездолета (хех, не удержусь и поставлю смайлик:)) Atlantis (в составе Айды - "убийцы" Лариски Крофт по размеру бюста, которая по совместительству еще и первый офицер корабля, Исаака Борисова, которому доверили должность технаря-оружейника, и товарища Не"Бана, который приснится может только тов. Лукасу и то в кошмарном сне) сделает все, чтобы вы не скучали, развлекая вас брифингами к миссиям, описаниями вооружений и просто приятной болтовней. Ну, а мы с вами вступаем в дело, садясь на свой личный "катафалк".
Вот тут-то и начинается самая приятная часть программы - отстрел всевозможной живности в погоне за семью частями древнего артефакта. Геймплей разнообразен - благо за долгие годы разработки девелоперы смогли придумать большое количество вариантов игры. Нам придется не только в одиночку продираться через лабиринты всевозможных научных лабораторий (а-ля Half-Life), но и участвовать в кооперативной обороне подступов к различного рода объектам. Слава богу "разукрашивание" геймплея на этом закончилось. Мы, к счастью, не найдем в списке обязательного прохождения игры акробатические этюды над пропастью а-ля Лара Крофт, а также до жути надоевшие примитивные пазлы. А вот вволю пострелять - это всегда пожалуйста, благо оружейный арсенал подобран что надо.
Подробно описывать каждый "ствол" нет смысла, но выделить особенности, пожалуй, стоит. Набор оружия получился, как и геймплей, помесью всевозможных идей последних лет шутеростроения. Дефолтный набор любого уважающего себя шутера присутствует в полном объеме: энергетический пистолет, дробовик, снайперская винтовка, ракетница. Гранатомет - продолжатель идей еще первого Unreal Tournament. Только теперь типов ракет аж 6, и все сопровождаются разноцветным фейерверком при взрыве. Ну, и на закуску тот самый огнемет. Тот, пламя которого на данный момент можно считать самым лучшим пламенем, которое когда-либо создавалось в играх. А наблюдать за носящимися из стороны в сторону "подпаленными" врагами - это, сами понимаете, еще то зрелище.
Боты, нужно им отдать должное, в игре одна из самых сильных сторон. Наконец-то можно не ворчать по поводу их непреодолимой тупости. Хотя и выезжают они в основном за счет отличной стрельбы и быстрого перемещения, в отличие от нас, потому что мы, бучи облаченными в такой бронежилет, который и Шварцнеггеру не снился, особо разогнаться не можем. Вот и получается, что вражины прыгают вокруг нас с сумасшедшей скоростью, а мы только и успеваем, что отпрыгивать. Ну да боевой опыт помогает - непобедимых ботов не бывает. На то они и боты.
Мало
"Неужели действительно так мало?" - спросите вы. Да, действительно мало, просто до обидного. Столько лет ожиданий - и все уместилось в двадцать пять коротких миссий, которые проходятся за один день. Но тут уж ничего не попишешь... Какое-то слово могли бы сказать какие-нибудь адд-оны, но... Скажите, вы готовы ждать еще годика 2 этого явления, чтобы потом сокрушаться насчет еще более короткого адд-она? Нет, это удовольствие не для меня.
Но главное, что расстраивает неимоверно - это то, что игра утратила свой главный козырь: неповторимую атмосферу. В некоторой мере она сохранилась, но по большей части это, как уже отмечалось выше, отличнейший "сплав" последних хитовых шутеров. Так ли это плохо? Для фанатов - плохо, для всех остальных - думаю, нет.